|
Easy-To-Build Very Inexpensive "Guitar Stand" |
|
Has this ever happened to you? You want to rest your guitar, just for a minute or two, and you decide it's not necessary to use a guitar stand (or maybe you never even bought one). So, you carefully balance it against a wall and you feel confident it will remain absolutely motionless resting on that solitary guitar button. Does it stay in place?
If you have ever attempted this precarious balancing act, then at least once your guitar tilted left or right, crashed onto the floor, and at best, the guitar neck and head became severely dented and bruised.
Perhaps the guitar suffered further damage with broken tuners, a broken nut, a cracked neck or a snapped guitar headstock.
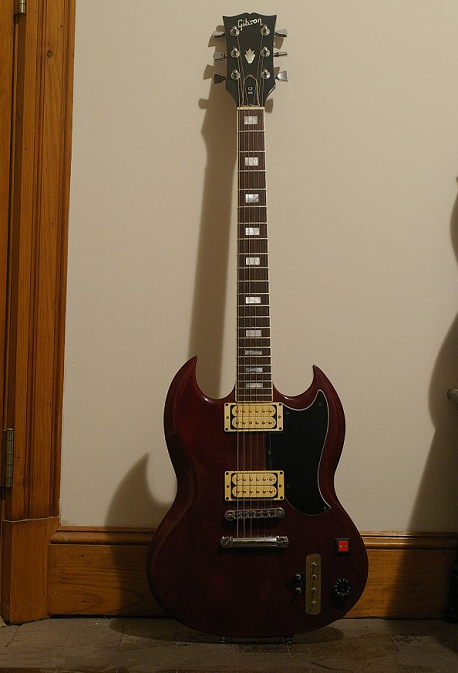
This guitar modification (see photo below) offers an easy, very inexpensive solution to avoiding guitar crashes. |
|
|
Remember any guitar modification could void your warranty or decrease its resale value. Then again which would more likely decrease your guitar's resale value – drilling 2 extra holes for the guitar buttons or having it undergo a perilous plummet to the floor?
This guitar modification requires a bare minimum of parts - a guitar button and a screw. If you have been playing guitar for any length of time, the chances are quite good that you have accumulated a wide variety of guitar parts and you already may have a guitar button and wood screw on hand. If not, these should be easy to find and are quite inexpensive.
|
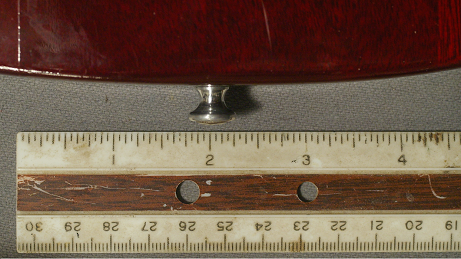 First, get a ruler and very cautiously (using a pen, a small nail, etc) mark the bottom of the guitar where you will eventually drive the screws for the guitar buttons. We recommend making these marks two inches to the left and two inches to the right of the present guitar button location. Remove the guitar button.
Using a hammer and carefully tapping a countersink tool into the marks you just made, make the starting holes for an electric drill.  Drive the countersink about a half inch into each of the marks. (You'll be surprised how much force this will require. Solid body electrics are made of very tough wood.)
After the starting holes are tapped, the bottom of the guitar should now look like this. 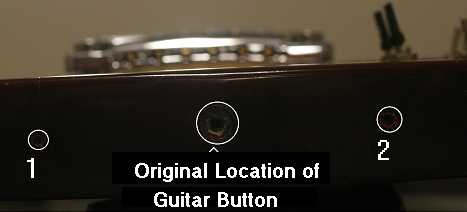 Select an appropriately-sized drill bit, then using your electric drill, insert it into starting holes (1) and (2) which you just made with the countersink tool. Drill to a sufficient depth such that the screws can be easily driven. Secure the guitar buttons into place using the screws. The bottom of the guitar now looks like this. 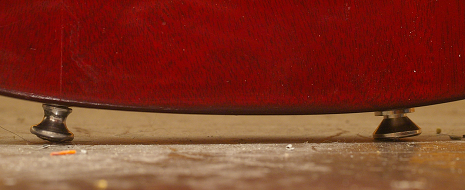
What is more important is for the guitar to "sit" almost vertically when placed against a wall. For this to occur, the guitar buttons should be close to equal height.
After inserting the grommet the guitar button heights are much more evenly matched.
Replace your guitar strap. 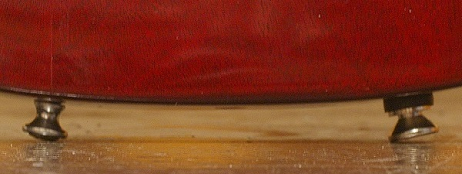
|
|